
Free UK Shipping
On Orders £30+. Next Day on Orders £80+
Same Day Dispatch
Weekday Orders Placed Before 3pm
Free Returns
100% Satisfaction Guaranteed
Lifetime Support
With Extended Warranties
Free UK Shipping
On Orders £30+. Next Day on Orders £80+
Same Day Dispatch
Weekday Orders Placed Before 3pm
Lifetime Support
With Extended Warranties
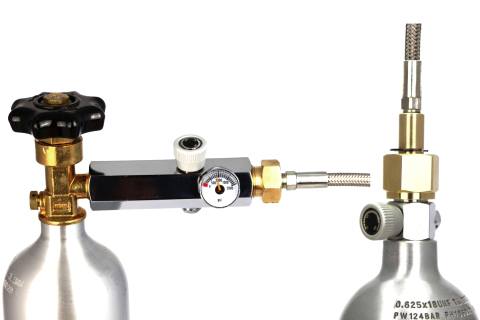
CO2 Cylinder Refill Adapter
Buy This Refill Adapter Here
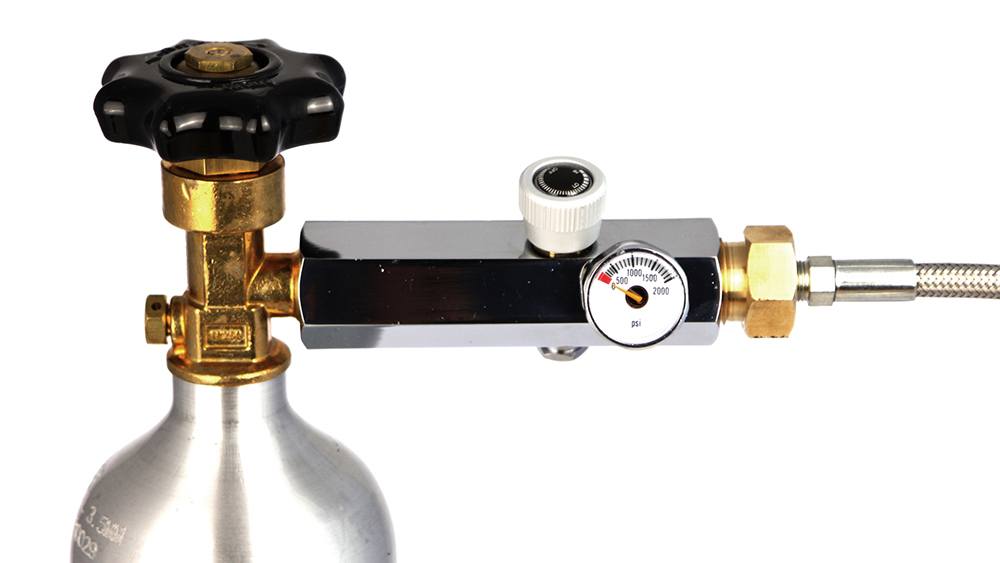
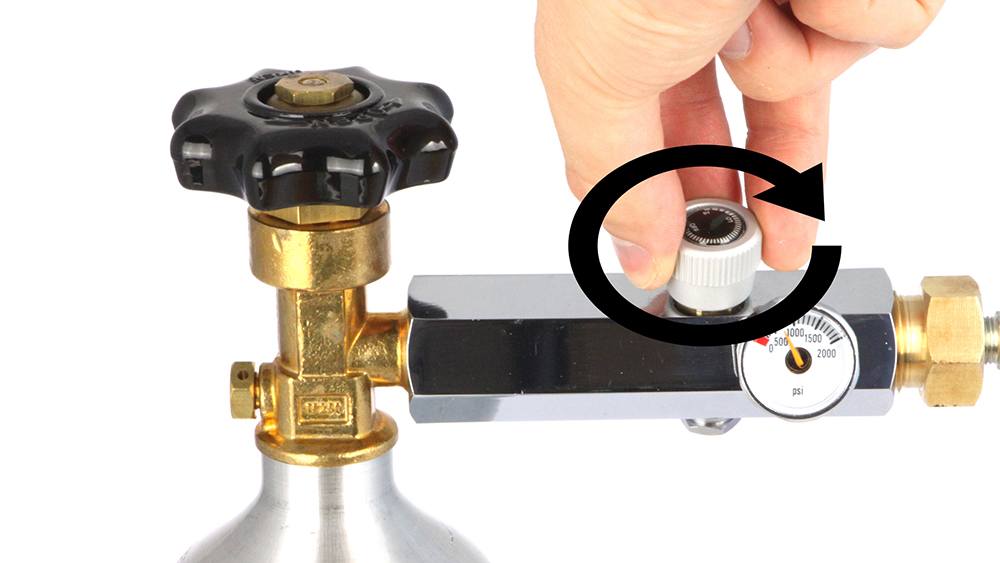
Know Your Equipment
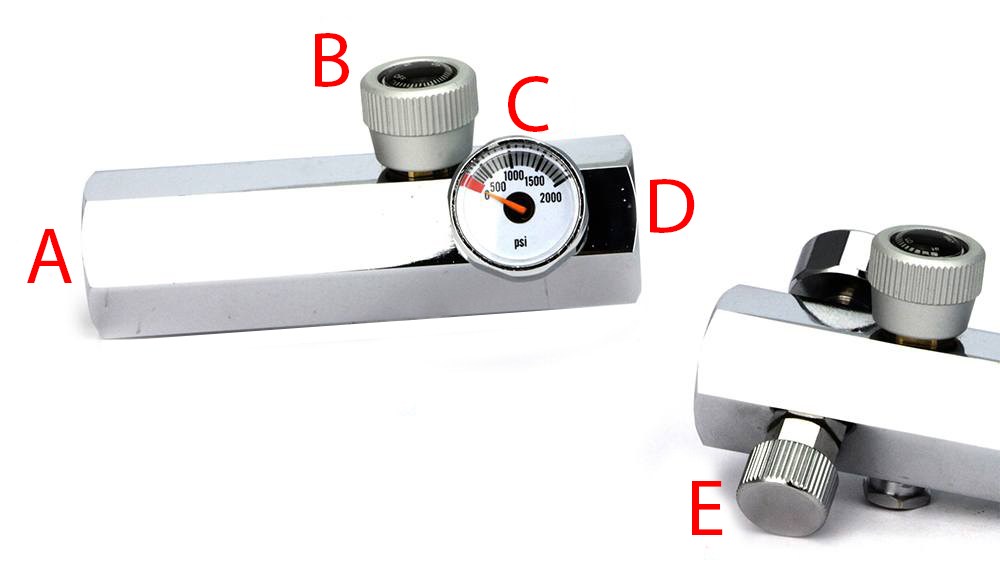
A: Inlet (screws to parent/donor cylinder).
B: Shutoff valve.
C: Pressure gauge.
D: Outlet (cylinder connection hose screws in here).
E: Dump / Purge valve.
Cylinder Preparation
Donor Cylinder Try to determine whether your donor cylinder uses a 'dip tube' inside. If your cylinder has a dip tube then it may be used in its normal orientation as liquid CO2 will be expelled from the cylinder. If your cylinder does not have a dip tube, then you may need to invert (turn upside-down) your donor cylinder so that liquid CO2 is expelled, rather than CO2 in its gaseous form. Refilling will still be achieved with gaseous CO2, but the recipient cylinder may not achieve its full capacity.Recipient Cylinder To ensure the recipient cylinder will accept its full capacity of gas / liquid CO2, it is recommended (if possible) to put the recipient cylinder in a freezer for 2 hours prior to refilling. This is not essential, but it will ensure the cylinder is filled to full capacity. Freezing lowers the pressure inside the cylinder, which enables it to readily accept more CO2.
Step-by-Step Instructions
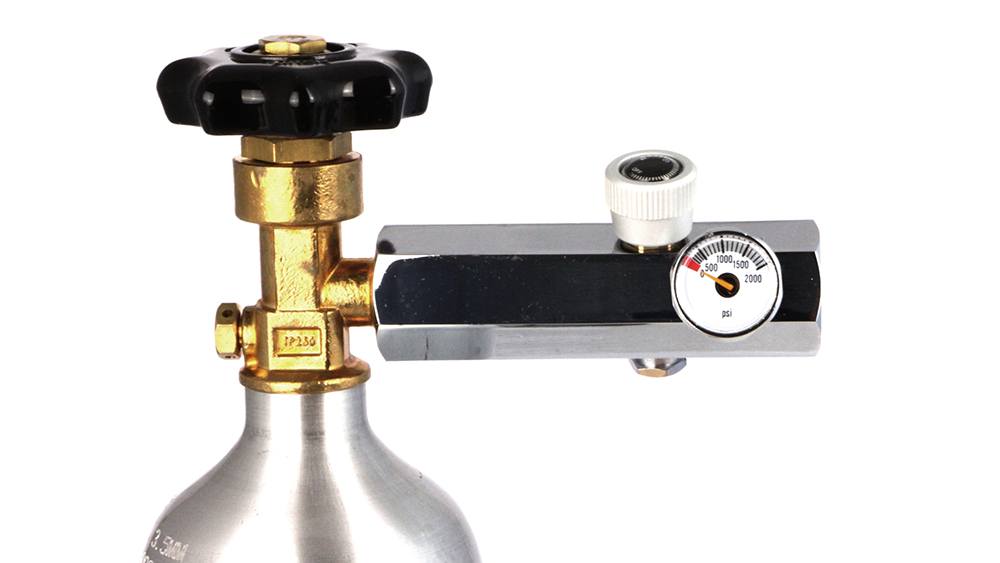
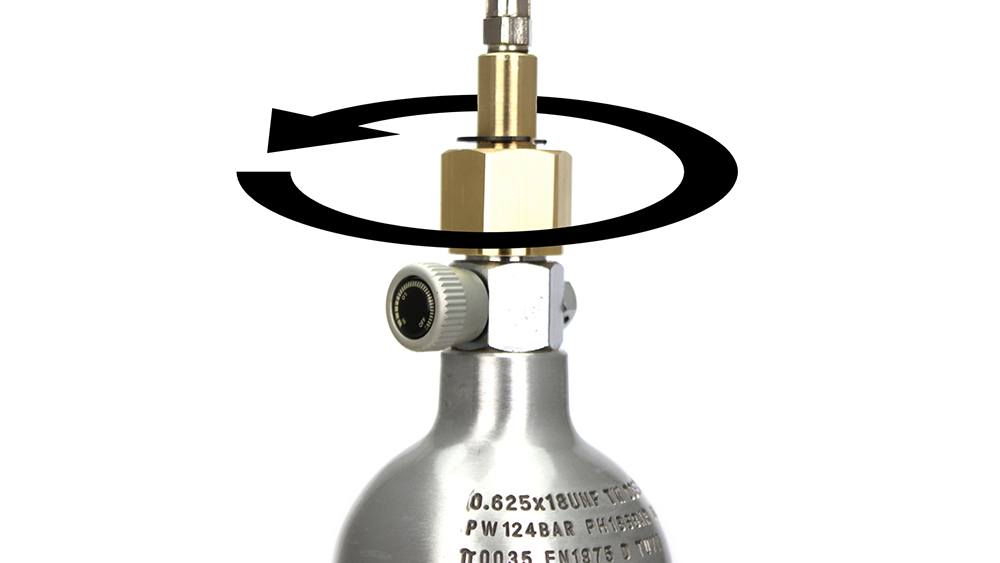
Step 1) Connect the refill adapter to the parent / donor cylinder at the adapter inlet (A). Tighten using a spanner or wrench (do not hand-tighten).
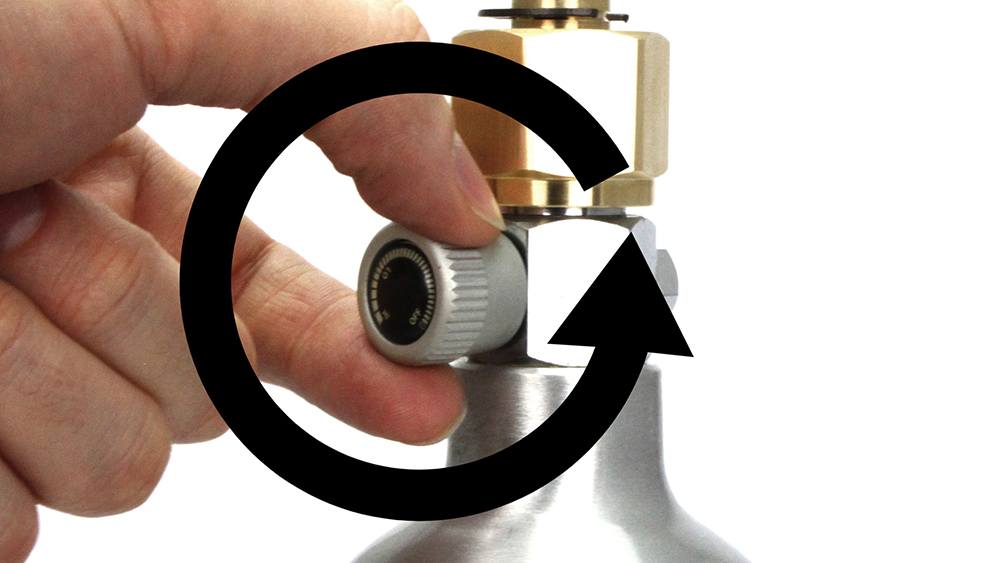
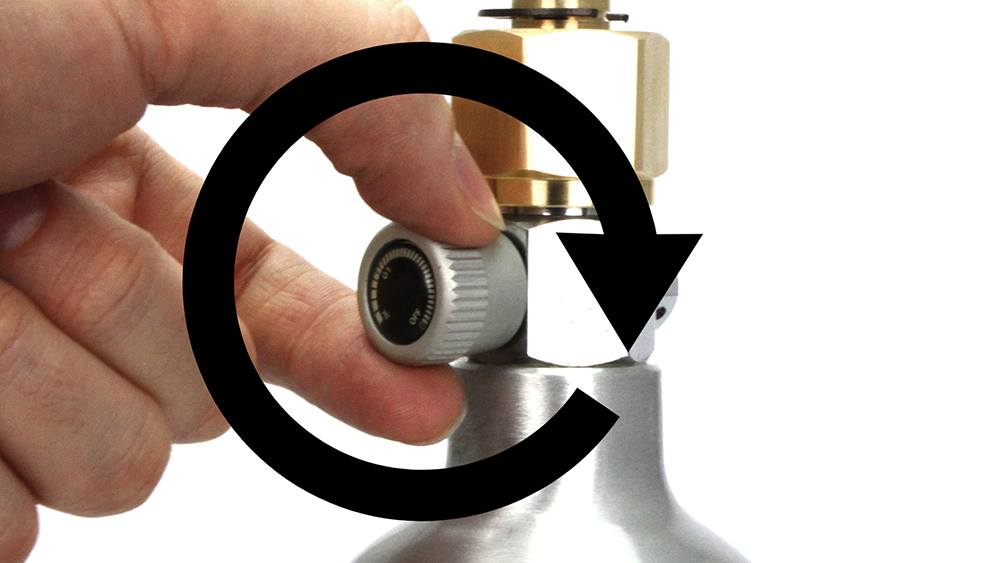
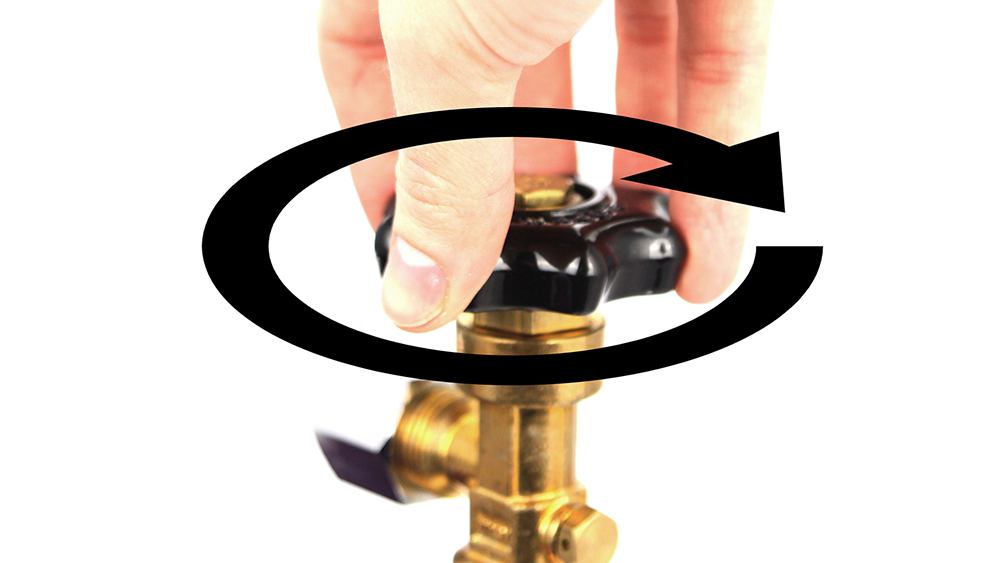
Step 2) Ensure the shutoff valve (B) on the adapter is closed by turning fully clockwise. Use gentle / moderate force to tighten, as over-tightening may damage the valve.
Step 3) Attach the connection hose to the adapter outlet (E) and tighten using a spanner or wrench (do not hand-tighten).

Step 4) Connect to the opposite end of the connection hose to the child / recipient cylinder. Tighten using a spanner or wrench (do not hand-tighten).
Step 5) Open the valve on the child / recipient cylinder so that it can receive the CO2.
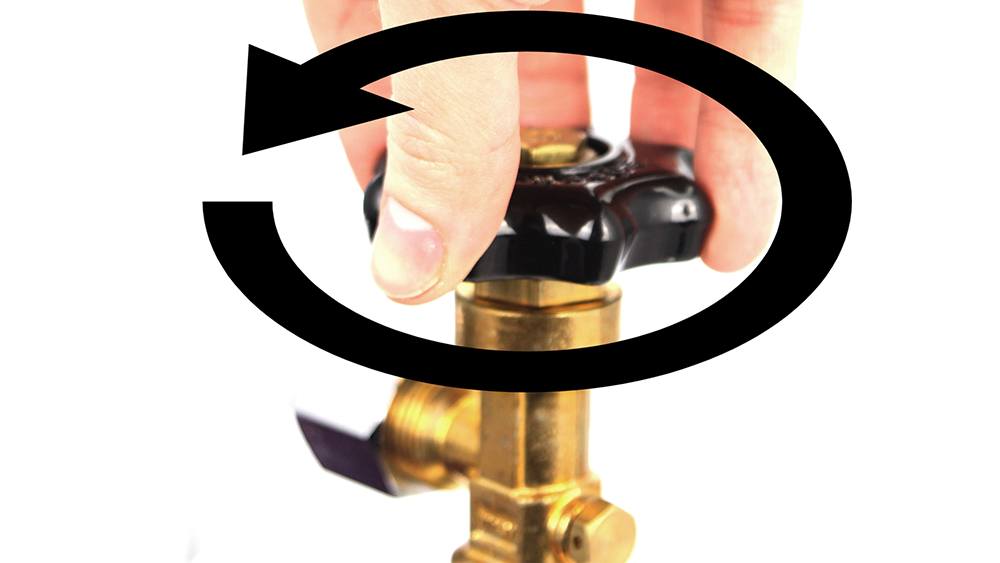
Step 6) Open the valve on the parent / donor cylinder to release the gas.
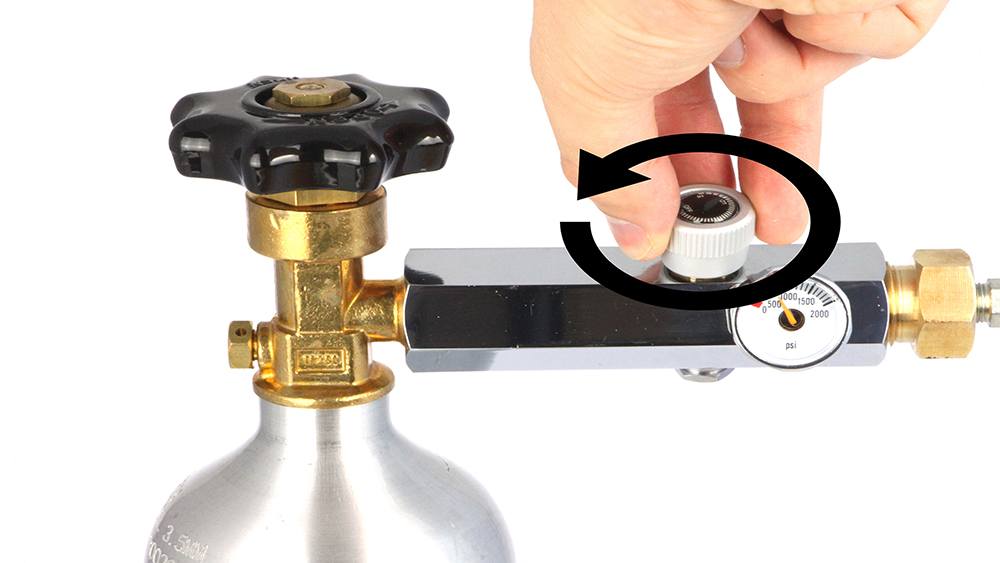
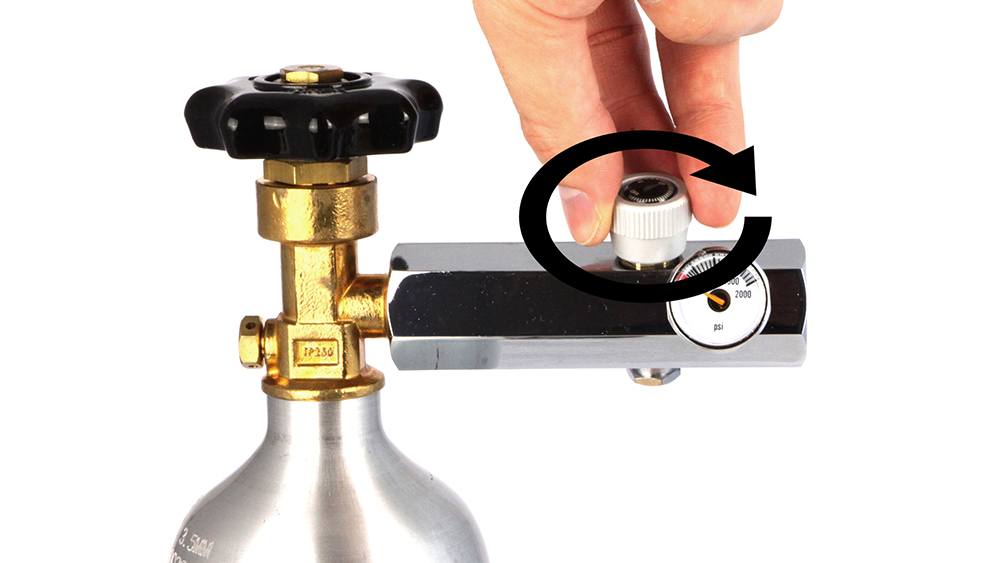
Step 7) Turn the shutoff valve (B) anticlockwise to begin the refill procedure. The pressure indicated on the gauge will drop to indicate the pressure between the donor and recipient cylinder. As the cylinder fills the pressure displayed on the gauge will increase.
Step 8) Continue to refill until either the pressure indicated on the gauge reaches the pressure of the recipient cylinder or you can no longer hear gas being transferred.
Once refilling is complete, turn the shutoff valve (B) clockwise to shut off the CO2.
Once refilling is complete, turn the shutoff valve (B) clockwise to shut off the CO2.
Step 9) Isolate the recipient cylinder by closing the valve.
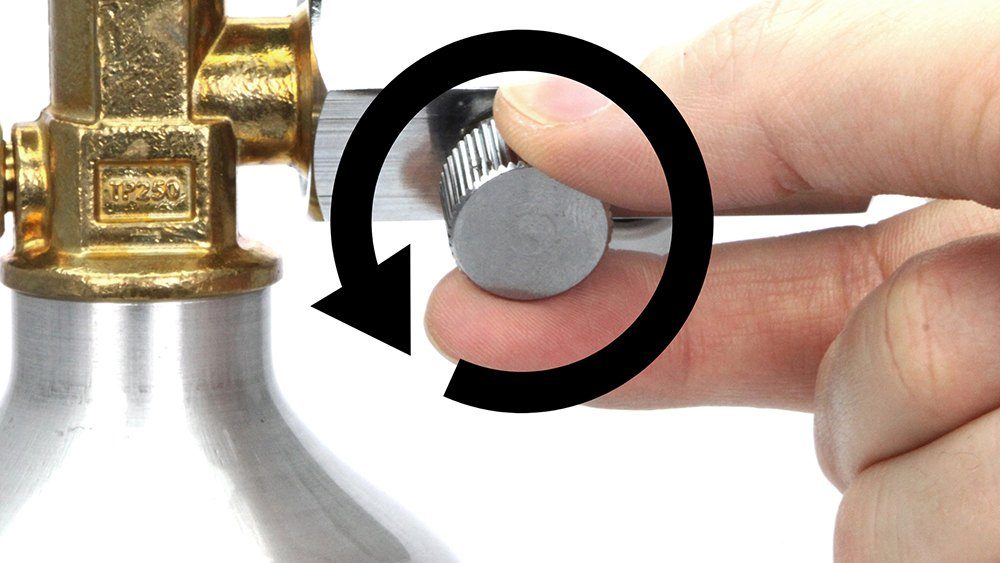
Step 10) Slowly turn the purge / dump valve (F) anticlockwise to release the residual gas contained in the apparatus. Upon doing so, you will hear a pronounced 'hiss' - this is normal. Once all of the gas has been released, turn the valve clockwise to close it again for next use.
Step 11) The connection hose can now be removed from the child / recipient cylinder.
Repeat the refill process for all cylinders you wish to refill in this batch.
Repeat the refill process for all cylinders you wish to refill in this batch.
Step 12) Once you have finished refilling all cylinders, close the valve on the parent / donor cylinder by turning clockwise and then dump the residual trapped gas in the apparatus by turning the shutoff valve anticlockwise.

Someone added a product to their cart
View ProductSomeone added a product to their cart
View Product